

How to Choose Durable Camping Gear: 2026 Guide
Table of Contents
- How to Evaluate Gear Durability Before You Buy
- Best Camping Gear Materials for Long-Term Use
- Three-Season vs. Four-Season Gear: Matching Equipment to Your Environment
- Weight, Packability, and the Weight-to-Durability Ratio
- How to Maintain Camping Equipment for Years of Use
- Camping Gear Repair Tips for Common Failures
- Budget vs. Premium Gear: Cost-Per-Use and Investment Pieces
- Frequently Asked Questions
Last Updated: September 27, 2026
How to Evaluate Gear Durability Before You Buy
Reading Denier and Fabric Specs
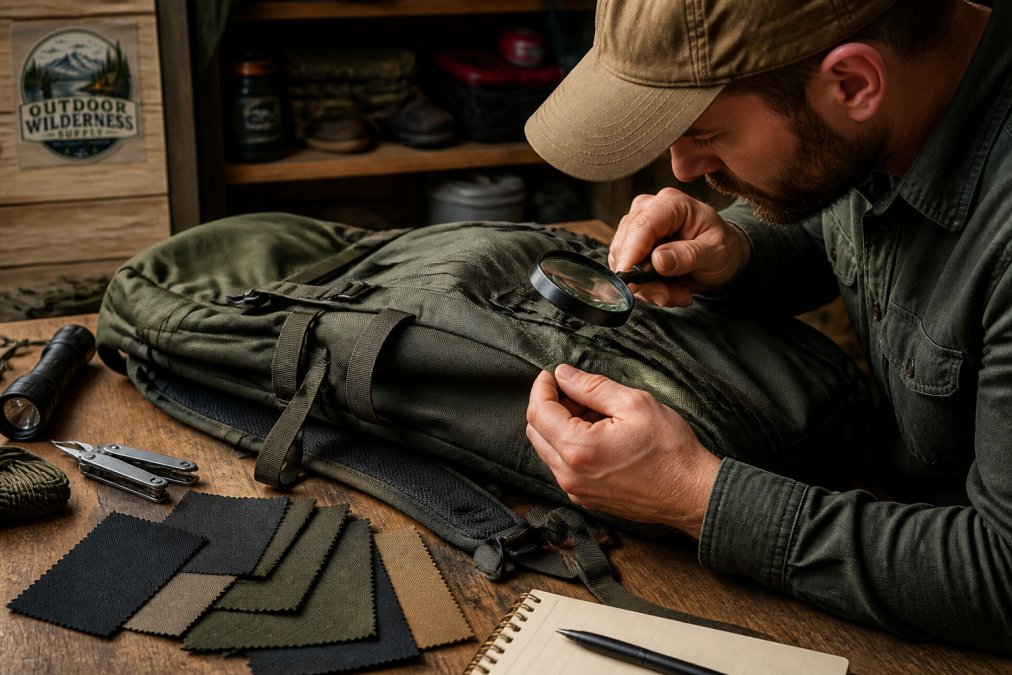
Denier is the weight in grams of 9,000 meters of a single fiber, so a higher number means a thicker yarn. Ripstop nylon uses a grid of reinforcing threads to stop tears from spreading, which is why it dominates lightweight tents and pack bodies. Canvas, usually 10 oz or heavier, trades weight for serious abrasion resistance.
Waterproof Ratings and Seam Sealing
A waterproof rating is the height of a water column, in millimeters, that a fabric holds before water pushes through. Taped or seam-sealed construction closes the needle holes left by stitching, the difference between a shell that keeps you dry and one that wets out at the shoulders.
Best Camping Gear Materials for Long-Term Use
The best camping gear materials balance weight, abrasion resistance, and moisture handling. Nylon leads on strength-to-weight, polyester resists UV degradation, and canvas wins on durability for base camps.
| Material | Strength | UV Resistance | Weight | Best For |
|---|---|---|---|---|
| Ripstop nylon | High | Moderate | Light | Tents, pack bodies |
| Polyester | Moderate | High | Light-medium | Rain flies, tarps |
| Canvas | Very high | High | Heavy | Wall tents, duffels |
Nylon vs. Polyester vs. Canvas
Nylon stretches slightly and absorbs more water than polyester, but it is stronger for its weight. Polyester holds shape and color under UV exposure, which matters for gear that lives outside all summer. Canvas is the buy-it-for-life option: heavy, but patchable, re-waxable, and repairable for decades.
Three-Season vs. Four-Season Gear: Matching Equipment to Your Environment
Three-season gear handles spring through fall; four-season gear adds structure and insulation for snow loads and subfreezing nights. Buy for the worst conditions you actually camp in.
Weight, Packability, and the Weight-to-Durability Ratio
Base weight, your pack minus consumables like food, water, and fuel, decides how far you'll comfortably hike. The weight-to-durability ratio is the real test: how much protection you get per ounce carried.
How to Field-Test Weight and Packability Before You Commit
You don't need a lab to evaluate gear, just a kitchen scale, a stuff sack, and twenty minutes.
- Weigh it dry, then wet. A tent listed at 4 lbs can gain a pound or more when the fly soaks through. Submerge a fabric swatch for ten minutes, blot it, and weigh again; fabrics that hold water add carried weight every mile.
- Measure packed volume, not just weight. Fill a marked stuff sack or a bin with known dimensions. A bag that compresses to 12 liters packs differently than one bulking to 20 liters; volume, not grams, forces you into a bigger pack.
- Check load transfer on your back. Load a pack to your expected trip weight and walk a mile. A flexing frame, riding hipbelt, or digging shoulder straps are durability problems in disguise: stress concentrates there and wears fabric and stitching faster.
- Look at abrasion contact points. Flip the pack over. Where it touches rock, trail, or truck bed should be a heavier denier than the body. If the bottom matches the thin lid fabric, it will fail first.
Where Weight Is Worth It and Where It Isn't
Ultralight gear saves grams with thinner fabrics and fewer features, usually meaning lower abrasion resistance and a shorter lifespan. Heavier gear lasts longer but costs you on the trail. Spend weight where it protects you, on shelter and sleep system, and save it on clothing and cookware.
Testing and Field-Evaluation Criteria
Before any piece of gear earns a permanent spot in your kit, run it through a short checklist on a real trip:
- Set it up and take it down three times. If a pole, clip, or zipper sticks on the third pass, it will fail on the tenth.
- Stress seams and anchors by hand. Tug strap anchors, guy-out points, and zipper ends; any stitch that pulls or fabric that distorts is a failure point.
- Use it in the worst weather you'll realistically see. A rain fly that beads water in the driveway may wet out under wind-driven rain.
- Note every snag, rub, or abrasion after the trip. Gear that shows wear after one outing will show failure after ten.
Keep a small notebook or phone note with the date you bought each major item and the trips it has been on. When something fails, you'll know whether it lasted three trips or thirty, and that pattern tells you more about a brand than any review.
How to Maintain Camping Equipment for Years of Use
Maintenance is where most campers lose years of gear life. Cleaning, drying, and storing equipment properly costs almost nothing and prevents the failures that force replacements.
High Quality 40L Water Resistant Unisex →
- Wash tents and shells with mild soap, never detergent, and air-dry fully before storage
- Re-apply DWR (durable water repellent) coating when water stops beading on the surface
- Store sleeping bags loosely, never compressed, to protect loft and fill power
- Lubricate zippers with silicone or paraffin, not oil-based products that attract grit
- Inspect guy lines, stakes, and pole shock cord each season for fraying or stretch
- Keep packs and tents out of direct sunlight and damp basements during the off-season
Camping Gear Repair Tips for Common Failures
Most guides stop at what to buy. The bigger lever is what you can fix. Gear that can be repaired is gear that lasts, so repairability should factor into every purchase decision.
How to Judge Repairability Before You Buy
Ask three questions about any tent, pack, or shell:
- Are the seams accessible? Taped seams that are buried under a laminated layer are hard to re-seal at home. Exposed seams you can brush with seam grip are a maintenance advantage.
- Are replacement parts sold? Poles, shock cord, zipper sliders, buckles, and guy line are the parts that fail first. If the maker sells them individually, the item has a longer service life.
- Is the fabric patchable? Tightly woven nylon and polyester take adhesive patches well. Some coated or laminated fabrics resist repair tape and require factory service.
Field Repair Kit: What Actually Earns Its Weight
A repair kit with seam tape, patches, spare cord, and a needle and heavy thread handles nearly every common failure. Build it around the failures you're most likely to see:
- Tenacious tape or adhesive patches for pinholes and small tears in tent fabric, shells, and sleeping pads.
- A pole splint (a short aluminum sleeve or a spare tent stake) plus duct tape for a snapped pole.
- Spare zipper sliders in the sizes your tent and pack use. A slider that separates is a five-minute fix; a failed zipper coil is not.
- Shock cord for tent poles. It stretches and loses rebound over seasons, and re-stringing is a home repair, not a field one.
- Seam grip and a small brush for re-sealing stitched seams and re-attaching delaminated tape.
- A few feet of guy line and a spare stake or two.
Step-by-Step Fixes for the Most Common Failures
Tent pole shock cord snaps. Unstring the pole sections, cut new cord to about two-thirds the assembled pole length, re-thread, tie off with a figure-eight knot, and trim.
Off-Season Storage: The Repair You Never Have to Make
Improper storage is one of the most common causes of gear degradation, and it's entirely preventable.
- Dry everything completely before storage. A damp tent breeds mildew that permanently damages coatings and weakens fabric; give gear a full day to air dry after a wet trip.
- Store sleeping bags loosely, never compressed. A large cotton or mesh sack protects loft and fill power.
- Keep gear out of direct sunlight and damp basements. UV degrades coatings and fabrics; humidity feeds mildew.
- Hang tents and shells if you can. Folding along the same creases season after season creates weak points.
- Inspect before you store, not before you leave. Guy lines, stakes, pole shock cord, and zipper pulls are easiest to replace in the off-season.
The most durable gear isn't the gear that never breaks. It's the gear you can fix yourself, on the trail or at home, without sending it back to a manufacturer. Buy for repairability, maintain it between trips, and store it dry, and a single piece of gear can outlast three replacements.
Budget vs. Premium Gear: Cost-Per-Use and Investment Pieces
Cost-per-use, not sticker price, tells you what gear actually costs you. A $30 tent that fails after three trips costs $10 per night; a $300 tent that lasts 100 nights costs $3 per night.
Frequently Asked Questions
What does denier mean when choosing camping fabrics?
Denier measures the thickness of individual fibers in a fabric. A higher denier number means thicker, heavier threads that resist abrasion better but add weight. For camping gear, 200D to 600D nylon is common for backpacks and tent floors. Lower denier, like 20D to 40D, works for ultralight tents where packability matters more than abrasion resistance. Match denier to your use: rough terrain demands higher denier, while lightweight backpacking can use lower.
How can I tell if a piece of camping equipment is high quality?
Check the technical specifications: fabric denier, waterproof rating (hydrostatic head), seam sealing, and hardware quality. Look for reinforced stress points, double-stitched seams, and quality zippers like YKK. Read the warranty and check if replacement parts are available. A high-quality piece will list specific materials and ratings, not vague claims. Also, inspect the weight-to-durability ratio; if it feels too light for its intended use, it may sacrifice longevity.
What are the most common points of failure in camping equipment?
Zippers, seams, and pole connections are frequent failure points. Tent poles can splinter, backpack straps can tear at attachment points, and waterproof coatings can wear off. Stove valves and lantern mantles also fail. Regular maintenance, like lubricating zippers and checking seams, prevents many issues. Carry a repair kit with seam sealant, pole splints, and patch material to handle field repairs and extend gear life.
Is it better to buy expensive camping gear for durability?
Not always. Higher price often means better materials and construction, but you pay for brand and features too. Focus on cost-per-use: a $200 tent used 50 times costs $4 per trip, while a $50 tent that fails after 5 trips costs $10 per trip. Look for investment pieces in critical items like tents and sleeping bags, where durability affects safety and comfort. For accessories, mid-range options can offer good value if you maintain them well.