

7 Steps to Pack for Wilderness Excursions
Last Updated: October 28, 2026
Quick Summary
Packing for wilderness excursions starts with matching your pack capacity to trip length, then building a day hike list around water, food, weather, and safety. Load heavy items close to your spine and mid-back, and carry the 10 Essentials on every trip. Finish by weighing your loaded pack, walking a mile with it, and trimming duplicates.
- A compact gray polyester day pack weighs 2.5 oz and folds into its own stuff sack.
- The 10 Essentials cover navigation, light, sun protection, first aid, knife, fire, shelter, and extras.
- Carry about two liters of water for a moderate day hike in mild weather.
- Pack one snack per two hours on the trail, plus lunch for hikes over four hours.
- Decide in advance what makes you turn around, such as falling behind by more than an hour.
Table of Contents
- Start With Trip Length, Activity, and Pack Capacity
- Build Your Day Hike Packing List
- The 10 Essentials for Hiking Every Excursion Needs
- How to Pack a Backpack for Hiking Without Wrecking Your Shoulders
- Layers, Footwear, and Shelter for Changing Conditions
- Water, Food, and Gear Quantities That Actually Hold Up
- Your Overnight Backpacking Checklist and Risk Plan
- Final Pack Check: Weigh It, Test It, Trim It
- Frequently Asked Questions
Start With Trip Length, Activity, and Pack Capacity
Packing well for wilderness excursions starts with one question: how long are you actually out there? A day hike, a weekend, and a multi-day pack trip each need a different setup, and guessing costs you weight or leaves you short.
Here is a simple way to size your load.
- Day hike: a small daypack, water, snacks, layers, and safety basics
- Overnight trip: a mid-size pack with shelter and sleep gear
- Multi-day hike: a large pack with food and fuel for every day
Match your pack capacity to trip length, not to how much gear you own.
Shop by the trip, then trim from there.
Build Your Day Hike Packing List
A day hike packing list is short, but it has to cover water, food, weather, and safety in one small pack. Get these right and a day hike stays simple.
Pack these items for any day on the trail:
- Water and a wide-mouth bottle or hydration reservoir
- Trail snacks and a small lunch
- Rain shell or poncho
- Extra insulation layer
- Map, compass, or offline navigation
- Headlamp with spare batteries
- Small first aid kit
- Sun protection and bug spray
- Phone and a small power bank
Daypack Setup for Short Excursions
A compact daypack keeps short excursions fast and light. Put water and snacks at the top for easy reach. Keep the rain layer near the top too, so you can grab it when weather shifts.
Our compact gray polyester day pack weighs just 2.5 oz and folds into its own stuff sack at 3.5 x 5.5 inches, so it disappears into a larger bag when not in use.
The 10 Essentials for Hiking Every Excursion Needs
The 10 Essentials are the emergency items every hiker should carry, even on a short trip. They cover navigation, light, first aid, and warmth when plans change.
The classic list includes:
- Navigation tools
- Headlamp or flashlight
- Sun protection
- First aid supplies
- Knife or multi-tool
- Fire starter
- Emergency shelter
- Extra food
- Extra water
- Extra clothes
Watch out: the 10 Essentials are not optional on "easy" trails. Weather and injuries do not check your route difficulty first.
How to Pack a Backpack for Hiking Without Wrecking Your Shoulders
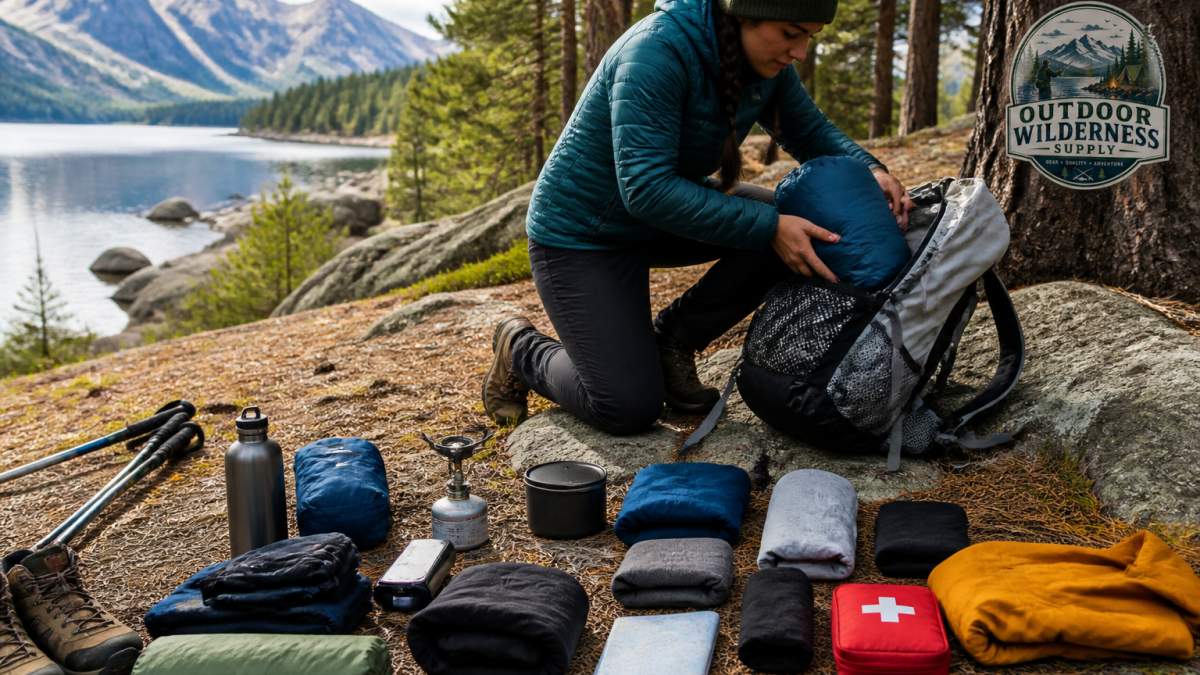
Follow these rules for how to pack a backpack for hiking:
- Keep heavy items close to your spine and mid-back
- Put light gear at the bottom and top
- Strap the sleeping bag low and outside
- Tighten all compression straps
- Adjust the hip belt before the shoulder straps
Pack-Loading Sequence From Bottom to Top
Load in this order to keep the pack balanced:
- Bottom: sleeping bag, spare clothes, light items
- Middle: heavy items like food, water, and stove, close to your back
- Top: rain layer, snacks, first aid
- Outside pockets: water bottle, map, items you grab often
Layers, Footwear, and Shelter for Changing Conditions
Weather on the trail changes fast, so pack for the worst case, not the forecast at the parking lot. Layers you can add or remove beat one heavy jacket.
- Base layer: quick-drying, moisture-wicking shirt
- Insulation layer: fleece or light puffy jacket
- Outer layer: waterproof rain shell or poncho
- Legs: trekking pants or quick-drying shorts
- Footwear: hiking shoes or boots with good grip for rough terrain
Water, Food, and Gear Quantities That Actually Hold Up
Quantity decisions are where most packs go wrong. Too little water is dangerous. Too much food is dead weight. The fix is to pack from decision rules instead of habit, and to adjust those rules for heat, altitude, trip length, and group size.
Water: Carry Enough, Know Where the Next Refill Is
- Baseline: about two liters for a moderate day hike in mild weather.
- Heat and steep climbs: add roughly half a liter per hour of hard effort, and more in dry heat.
- Overnight and multi-day: carry capacity for the longest dry stretch between water sources, not the average. A filter or treatment tablets let you refill instead of hauling.
- Rule of thumb: if you are not sure, carry one extra liter and know your next source.
Food: Fuel the Hours, Not the Miles
- Day hikes: one snack per two hours on the trail, plus a lunch for anything over four hours.
- Overnight trips: one full meal per night plus a backup snack and one extra day of food.
- Cold and altitude: appetite drops and calorie needs rise, so pack calorie-dense food you will actually eat, nuts, bars, and nut butter travel well.
- Group trips: assign shared meals to one person and split the weight, but keep each person's emergency food separate.
Fuel, Batteries, and Consumables
- Fuel: one small canister per person for a weekend trip; add a canister for cold weather or long boils.
- Batteries: one spare set for every light and device, and carry them in a dry bag.
- Consumables: pack out all trash, including food wrappers and hygiene items, and carry a small waste bag for the trip.
A compact gas backpacking stove boils water and cooks meals with minimal fuel. For overnight trips, add one full meal per night plus a backup snack.
Weight Targets and Decision Rules
Use these rules to choose between alternatives:
- Shelter: a tent is heavier but freestanding; a tarp is lighter but needs stakes and skill. Pick based on exposure and experience.
- Sleep system: match the bag rating to the overnight low, not the daytime forecast, and add a pad with a real R-value for cold ground.
- Layers: one insulation layer and one shell beat three middling jackets.
- Duplicates: if two items do the same job, leave the heavier one home.
Here are the quantity rules of thumb the article gives for water, food, fuel, and batteries.
| Item | Quantity | Note |
|---|---|---|
| Water (moderate day hike) | About two liters | Mild weather baseline |
| Water (heat, steep climbs) | Roughly half a liter per hour | Hard effort, more in dry heat |
| Water (unsure) | One extra liter | Know your next source |
| Food (day hikes) | One snack per two hours | Plus lunch over four hours |
| Food (overnight trips) | One full meal per night | Plus backup snack and one extra day |
| Fuel | One small canister per person | Weekend trip; add one for cold |
| Batteries | One spare set per light and device | Carry them in a dry bag |
Your Overnight Backpacking Checklist and Risk Plan
Start with the gear that turns a day kit into an overnight kit:
- Tent or shelter with stakes and a footprint
- Sleeping bag and insulated pad
- Stove, fuel, and cook pot
- Food for every meal plus one extra day
- Water filter or treatment tablets
- Headlamp and spare batteries
- First aid kit
- Emergency shelter and fire starter
- Repair kit: duct tape, cord, and a patch for your pad
The one we carry is water repellent, withstands temperatures as low as 30°F, and weighs 4.2 lbs with its compression sack.
Build a Risk Plan Before You Leave
A risk plan is a short written page you leave with someone at home and carry in your pack. It answers four questions: where you are going, when you will be back, what could go wrong, and what you will do about it.
- Route and timeline: Share your route, campsites, and expected return time with a responsible person. Give them a hard check-in deadline and tell them who to call if you miss it.
- Weather window: Check the forecast for the full trip, not just the first day. Note the wind and overnight low, because those drive your shelter and sleep system choices.
- Water sources and bailouts: Mark refill points and at least one early-exit route on your map. Know the distance to the nearest trailhead from each campsite.
- Emergency communication: A satellite messenger or personal locator beacon works where cell service does not. Carry one if your route leaves coverage, and test it before you go.
- Wildlife precautions: Store food in a bear canister or hang it away from camp where required, and know the local wildlife rules for your area (Wilderness Food Storage). Keep scented items out of your tent.
- Contingency triggers: Decide in advance what makes you turn around, a blown forecast, an injury, or falling behind schedule by more than an hour. A written trigger is easier to follow than a judgment call at dusk.
Pack the Risk Plan, Not Just the Gear
Keep your written plan, a map, and your communication device in the same top-lid pocket so anyone in the group can find them. Brief your partner on the plan before you leave the trailhead, and agree on the turn-around trigger out loud. A plan that lives only in your head is not a plan.
Final Pack Check: Weigh It, Test It, Trim It
The last step is the one most people skip. Weigh your loaded pack, wear it around the house, and cut what you do not need.
Run this final check:
- Weigh the pack and compare it to your target
- Walk a mile with it fully loaded
- Check that the hip belt carries the weight
- Remove duplicate items and "just in case" gear
- Confirm water, food, and layers match the trip
- Pack out all trash and follow Leave No Trace
Aim to trim, not add. If you did not use an item on your last trip, leave it home this time.
Packing for wilderness excursions gets easier with practice and the right gear. Outdoor Wilderness Supply carries dependable, practical equipment, including compact day packs and backpacking stoves. Our curated selection covers camping, fishing, and water recreation, so you can prepare once and head out ready. Specialized pursuits like angling require a more nuanced approach to load management, which is detailed in our fly fishing gear guide to ensure your tackle remains organized and accessible on the water.
Get started with Outdoor Wilderness Supply on your next trip.
Frequently Asked Questions
What should I pack for a wilderness excursion?
Add clothing layers and food sized to your trip length. For overnight trips, add a sleeping bag, shelter, stove, and extra food. Build the list around trip length, terrain, and weather rather than copying a generic checklist.
How do I keep my backpack light while still packing essentials?
Weigh the loaded pack before you leave and cut duplicate items first. Repackage food into smaller bags, leave the camp chair at home for short trips, and wear your heaviest layer instead of packing it. A compactable daypack that folds into its own stuff sack, like the Gray Polyester Day Pack at 2.5 oz, is an option for side trips. Trim until the pack feels manageable on a test walk, not just on the living room floor.
How much water should I bring on a wilderness hike?
Plan refills around known water sources. On longer excursions, check your route map for water before you leave.
What gear do I need for an overnight wilderness excursion?
An overnight backpacking checklist adds shelter, sleep system, cooking gear, and extra food to your day kit. A 3-season sleeping bag rated for the temperatures you expect, a tent or tarp, a compact gas stove, fuel, and a headlamp are items to consider. Test the full load on a short walk before the real trip.
