

Lightweight Survival Gear for Backpacking: 2026 Guide
Table of Contents
- Why Lightweight Survival Gear Matters on the Trail
- Ultralight Survival Kit Checklist for Backpackers
- How to Build a Survival Kit for Beginners
- Best Multi-Functional Survival Tools to Carry
- Weight-to-Utility Ratio: Calculating What Earns Its Place
- Gear Failure Contingency Planning and Regional Kit Adjustments
- Frequently Asked Questions
Last Updated: September 23, 2026
Why Lightweight Survival Gear Matters on the Trail
Every ounce you carry has a cost, and that cost compounds with every mile. Lightweight survival gear for backpacking is the practice of selecting tools that keep you safe in an emergency without weighing down your pack.
Ultralight Survival Kit Checklist for Backpackers
An ultralight survival kit checklist covers three categories: shelter and sleep, essential safety items, and navigation and signaling tools. The goal is coverage, not volume, so every item should solve more than one problem.
Shelter, Sleep, and Pack: The Big Three
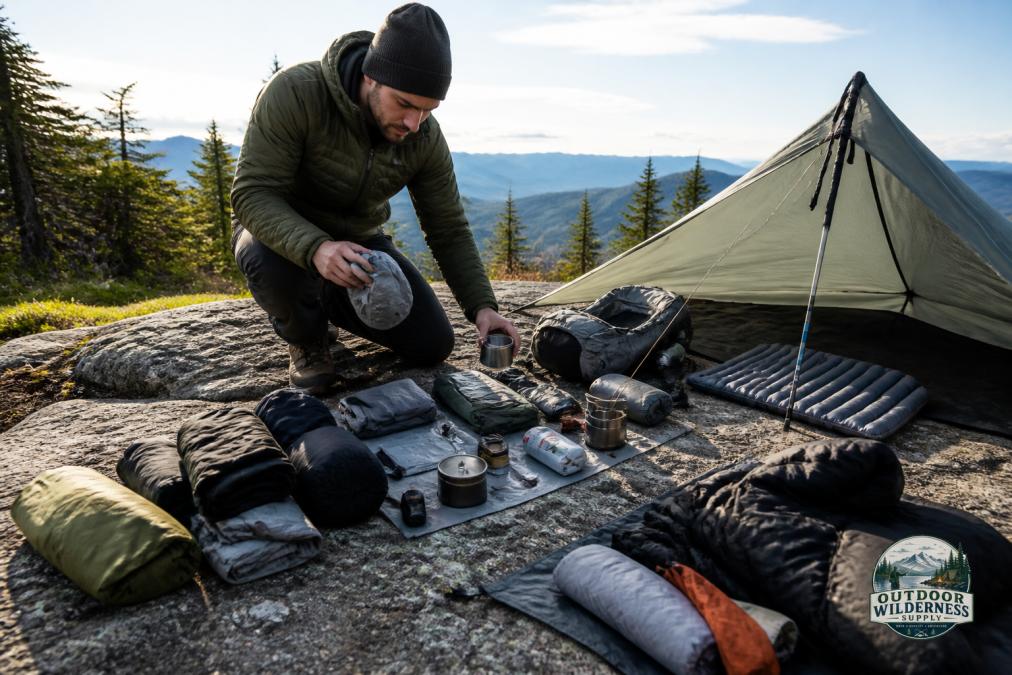
Your shelter, sleep system, and backpack form the foundation of everything else you carry. Get these right and the rest of your kit falls into place.
Essential Survival Kit Items Beyond the Big Three
Fire, water, light, and first aid round out any kit. These items are small but non-negotiable.
- Fire starter: Ferrocerium rod and waterproof matches in a sealed container
- Water filtration: A filter straw or pump rated to 0.1 microns
- Lighting: A headlamp with spare batteries, plus a small backup light
- First aid kit: Bandages, antiseptic, blister treatment, pain relievers, and any personal medication
- Cordage: 50 feet of paracord for repairs, shelter, and gear fixes
- Emergency blanket: Reflects heat and doubles as a tarp or signaling panel
- Multi-tool: Pliers, knife blade, and screwdrivers in one handheld unit
- Emergency rations: High-calorie bars that hold up in heat and cold
How to Build a Survival Kit for Beginners
Building a survival kit for beginners starts with one rule: buy for the conditions you actually hike in, not the ones you imagine. Most new backpackers overspend on gear for extreme scenarios and underprepare for the ordinary ones.
A simple starter sequence:
- Choose your shelter and sleep system based on expected low temperatures
- Add fire, water, and light
- Build a first aid kit around your specific health needs
- Add navigation and signaling tools
- Test everything on a short overnight trip before a long one
Best Multi-Functional Survival Tools to Carry
The best multi-functional survival tools replace two or three single-purpose items, which is where real weight savings come from. Look for tools that solve problems across shelter, cooking, repair, and signaling, and evaluate each one by asking how many distinct failure scenarios it addresses.
| Tool | Typical Weight | Primary Use | Secondary Use | Trade-Off to Know |
|---|---|---|---|---|
| Trekking poles (pair) | 14-16 oz | Stability on trail | Tent support, splint, probe | Carbon saves weight but can snap; aluminum bends instead of breaking |
| Multi-tool | 4-9 oz | Repairs and cutting | Fire prep, gear fixes, first aid | Heavier models add tools you'll never use; pick one with pliers and a locking blade |
| Filter straw | 2-4 oz | Drinking water | Emergency backup to a pump | Clogs in silty water; backflush or carry a backup chemical treatment |
| Headlamp | 2-4 oz | Hands-free light | Signaling, camp chores | Battery type matters, AAA is universal, rechargeable saves weight on long trips |
| Paracord (50 ft) | 4-5 oz | Shelter setup | Repairs, bear hang, splint | 550 cord is strong but bulky; 2mm Dyneema saves weight at higher cost |
| Ferrocerium rod | 1-2 oz | Fire starting | Signaling (sparks) | Needs dry tinder; pair with a small lighter as backup |
Weight-to-Utility Ratio: Calculating What Earns Its Place
The weight-to-utility ratio is a simple calculation that tells you whether an item earns its place in your pack: divide the item's weight in ounces by the number of distinct tasks it performs. Lower numbers mean better value.
Run this test on every item over 4 oz.
Gear Failure Contingency Planning and Regional Kit Adjustments
Gear failure contingency planning means assuming at least one critical item will break or fail, then carrying a backup that covers the gap. Regional adjustments mean tailoring your kit to the terrain and climate you actually hike in. Together, they form the layer most lightweight gear guides skip, and the one that keeps a minor failure from becoming an emergency.
The Failure-Mode Framework
For each critical item, ask three questions: What breaks? What's the consequence? What's the lightest backup?
- Water filter clogs or freezes: Consequence is dehydration or illness. Backup: chemical treatment tablets (1-2 oz) or a backup filter straw. In freezing conditions, sleep with your filter to keep it from icing.
- Stove fails or runs out of fuel: Consequence is no hot food or water, which matters most in cold conditions. Backup: a small alcohol stove or a few fire-starting methods that don't depend on fuel canisters.
- Shelter pole snaps: Consequence is a collapsed tent in bad weather. Backup: a repair sleeve (a few grams) or the ability to pitch with a spare pole or trekking pole. Know your shelter's alternate pitch before you need it.
- Headlamp dies: Consequence is no light for navigation or camp tasks. Backup: a tiny keychain light (under 1 oz) or spare batteries. In an emergency, your phone's flashlight works but drains battery you may need for navigation.
- Pack strap or buckle breaks: Consequence is an unmanageable load. Backup: a few feet of cordage and a spare buckle. This is where your paracord earns its weight.
Regional Kit Adjustments
Regional adjustments matter just as much as contingency planning, because the same failure has different consequences in different terrain:
- Desert terrain: Extra water capacity, sun protection, and a signaling mirror for open ground. Your water filter matters less than your water storage, carry more than you think you need, and know that a filter won't help if there's no water to filter.
- Alpine terrain: Warmer insulation, a four-season shelter, and traction devices. Gear failure here is more dangerous because weather turns fast and help is far away. Your contingency plan should assume you'll spend an unplanned night out.
- Wet coastal terrain: Stronger weatherproofing, a bivy-style shelter, and quick-dry layers. Moisture is the failure mode, gear that stays wet loses insulation value. Pack critical items in dry bags, not just a pack cover.
- Forest terrain: Cordage for shelter, a reliable fire starter, and bug protection. Navigation is harder here because landmarks are hidden; carry a compass and know how to use it when your phone dies.
Frequently Asked Questions
What survival gear should I carry while backpacking?
Carry the ten essentials plus a shelter and sleep system. That means navigation tools (map, compass), a headlamp, sun protection, first aid supplies, a multi-tool, fire starter, emergency shelter, extra food, extra water, and extra clothes. For overnight trips, add a trekking pole tent, a 3-season sleeping bag rated to 30°F, and an inflatable sleeping pad. Keep the total base weight under 15 pounds so the load stays manageable on long climbs.
How do I keep my ultralight survival kit checklist from getting too heavy?
Weigh every item in grams or ounces and track your running base weight. Choose multi-use gear: trekking poles that double as tent supports, a sleeping pad with a built-in pillow, and a stove that nests inside your cook pot. Leave behind single-purpose items you can improvise. A 30-35L waterproof daypack with a roll-top closure lets you compress your load as consumables shrink, keeping the pack stable on your back.
Is it better to buy a pre-made survival kit or build my own?
Building your own usually wins for backpacking. Pre-made kits often include bulky items you will never use and skip the shelter and sleep components you actually need. Start with a checklist, add gear that matches your terrain and season, and test everything on a short overnight trip. If you are new, buy the core pieces individually: shelter, sleep system, water filtration, fire starter, and a multi-tool. You will end up with a lighter, more useful kit.
What is the most important survival tool for hikers?
A reliable fire starter and a water filter straw are the two tools that matter most in an emergency. Fire provides warmth, light, and a way to boil water. A 0.1-micron filter straw lets you drink from streams and lakes. After those, a multi-tool handles gear repairs, and a signaling mirror or whistle lets rescuers find you. Pack all four and you cover the biggest survival risks on any trail.
How much should a lightweight survival kit weigh for a weekend trip?
Aim for a base weight (everything except food, water, and fuel) of 10 to 15 pounds for a weekend trip. The Big Three, shelter, sleep system, and backpack, usually make up 60 to 70 percent of that. A trekking pole tent like the Trekker Tent 1A saves weight by using your poles for support. Weigh each item, compare it to its utility, and cut anything you did not use on your last trip.
Backcountry safety comes down to preparation, not luck. The right system keeps your pack light while covering the emergencies that actually happen. Outdoor Wilderness Supply carries dependable gear for exactly that purpose, including trekking pole tents, multi-functional tools, and water filtration built for real trail conditions. Browse our curated selection and build a kit that performs when it matters.