

7 Terrain Types and the Gear Each One Demands
Last Updated: October 25, 2026
Quick Summary
Choosing terrain gear means matching traction, recovery, repair, and survival tools to the ground you actually drive. Start with tires and pressure changes for the surface, then add rated recovery points and a pulling tool that fit together. Build the kit in that order so every item solves a problem your terrain creates.
- Traction comes first: tires and pressure changes handle most stuck situations before a strap leaves the bag.
- Match every recovery component to the same working load limit, or the weakest link decides the outcome.
- Airing down increases the tire's contact patch, which is exactly what sand and rock want.
- Prioritize spending on tires that match your most common terrain before recovery gear.
- Keep heavy tools low and forward, since roof weight raises the center of gravity on side slopes.
Table of Contents
- Start With the Trail, Not the Catalog
- The Off-Road Gear Checklist That Follows Terrain
- Best Tires for Different Terrains: Match Tread to Ground
- Off-Road Recovery Gear: Build Around the Stuck Scenario
- Beginner Off-Roading Essentials Without the Bulk
- Tire Pressure and Load: The Adjustment Most Drivers Skip
- Packing, Weight, and Budget Trade-Offs That Decide the Trip
- Build Your Terrain Kit With Outdoor Wilderness Supply
- Frequently Asked Questions
Start With the Trail, Not the Catalog
Choosing terrain gear starts with the ground under your tires, not the product page. At Outdoor Wilderness Supply, we see the same pattern in nearly every beginner's kit: a pile of parts bought for the brand name, then a trail that asks for something else entirely.
Rock gardens chew sidewalls. Deep mud swallows narrow tires. Loose sand wants flotation, not bite. The same winch that saves you in a bog can be dead weight on a shelf for two years.
That is why we build kits backward. If you want a deeper look at how durability changes by surface, our guide on how to choose durable camping gear walks through the same logic for camp equipment.
A terrain gear plan is a short list of tools matched to the ground you actually drive, not the ground in a brochure. Below, we break down seven terrain types and what each one demands.
The Off-Road Gear Checklist That Follows Terrain
The core off-road gear checklist splits into four groups: traction, recovery, repair, and survival. Every item earns its place by solving a problem a specific surface creates.
Here is how the groups map to terrain:
| Gear Group | What It Solves | Terrain That Demands It |
|---|---|---|
| Traction | Loss of grip, sinking | Sand, mud, snow, rock |
| Recovery | Getting unstuck | Mud, sand, water crossings |
| Repair | Broken parts mid-trail | Rock, rugged terrain |
| Survival | Injury, weather, nightfall | All terrain, remote trails |
Traction comes first. Tires and pressure changes handle most stuck situations before a strap ever leaves the bag.
Recovery gear sits second because even good tires lose. A winch, tow strap, and rated recovery points turn a two-hour dig into a ten-minute pull.
Repair supplies cover the damage rocks and roots cause: spare tire, spare lug nuts, a shovel, an axe, and a basic tool kit. Survival gear is the layer you hope stays sealed, but it rides along on every trip.
Build the checklist in that order and you avoid buying recovery gear before you own tires that can actually get you to the trailhead.
Best Tires for Different Terrains: Match Tread to Ground
The best tires for different terrains come down to one trade-off: how much grip you gain versus how much road noise and wear you accept. All-terrain tires suit mixed use. Mud-terrain tires win in soft ground and lose on pavement.
Match the tread to the surface you drive most:
- Sand and loose dirt: wide all-terrain tread, aired down for flotation
- Mud and clay: aggressive mud-terrain lugs that clean themselves
- Rock and gravel: tough sidewalls and a tread that grips edges
- Snow and seasonal conditions: tread with dense sipes for packed surfaces
Tire durability matters as much as pattern. Sharp rock punishes thin sidewalls, so a heavier casing pays off on rugged terrain even if it costs a little fuel.
Tire size and gear ratio belong in the same conversation. Bigger tires raise ground clearance, but they also change how the transmission delivers power. A lift and larger tires without a matching gear change can leave a four-wheel drive vehicle sluggish on climbs.
The Tire Industry Association's consumer tire guidance explains load ratings and sidewall markings, which matter when you pick a tire for a loaded rig. Read the sidewall before you read a review.
Off-Road Recovery Gear: Build Around the Stuck Scenario
Off-road recovery gear should be chosen for the specific way you expect to get stuck. Mud calls for a kinetic pull. A ledge or a buried axle calls for a controlled winch line.
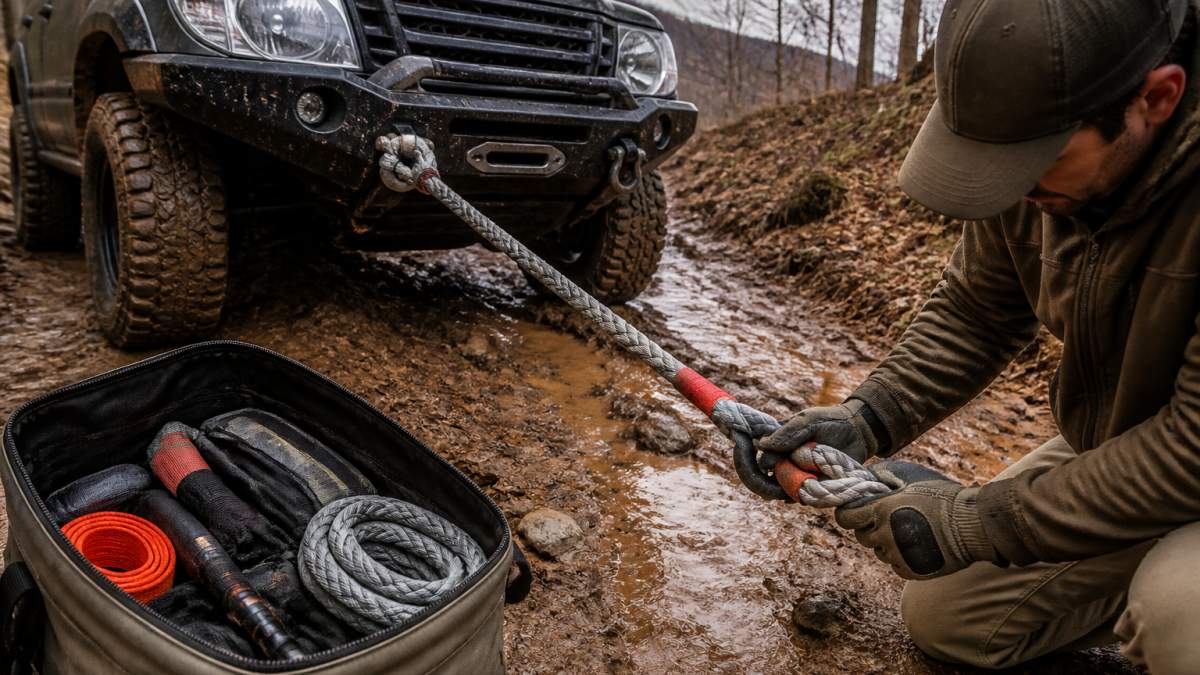
Start with rated recovery points. A tow strap hooked to a bumper bracket is a projectile waiting to happen.
Then pick your pulling tool by scenario:
- Kinetic rope: stretches to absorb shock, best for sand and mud where a rolling resistance pull works better than a static yank
- Winch: steady line pull for ledges, trees, and heavy vehicles; match winch capacity to vehicle weight and add a margin for stuck suction
- Tow strap: static pulls where a gentle tug is enough; never use a strap with elastic properties for a kinetic pull
- High-lift jack: lifting a buried corner or breaking a tire bead; always use with a stable base and never under a vehicle without jack stands
- Shovel and axe: the tools that solve more stucks than anything powered
Compatibility is where kits fail. Rope ratings, shackle ratings, and anchor strength must line up, or the weakest link decides the outcome. A common pattern is a 30,000-pound kinetic rope paired with 3/4-ton shackles, the shackles become the failure point.
Recovery planning starts before you leave. Know your vehicle's weight, identify safe anchor points on the route, and carry a tree protector so you don't damage the environment you came to enjoy.
Our 4x4 vehicle recovery rope and soft shackle combo pairs a rated kinetic rope with matching soft shackles so the connection is settled before you leave the driveway. If you want one bag that covers both kinetic pulls and winch work, the Essential 4x4 Recovery Kit groups the rope, ring, tree protector, and shackles together.


Beginner Off-Roading Essentials Without the Bulk
Beginner off-roading essentials fit in one bag if you resist the urge to pack for every disaster at once. The goal is a lean kit you will actually carry and check.
Start with these:
- Tire pressure gauge and a portable air compressor
- Tire deflators for quick air-down at the trailhead
- A basic tool kit and repair supplies
- First aid kit and emergency kit
- Spare tire, spare lug nuts, and a lug wrench
- Water, layers, and a light source
Bulky survival gear is the classic beginner trap. Heavy kits get left in the garage because they are a hassle to load. Our breakdown of why heavy survival gear fails explains the weight-versus-durability trade-off in plain terms.
For backpackers and riders who count ounces, our lightweight survival gear guide shows how to keep the essentials without the bulk.
Storage matters too. A rattle-free bag keeps tools findable and keeps the cabin clean. Pack by job, not by item: traction bag, recovery bag, repair bag.
Tire Pressure and Load: The Adjustment Most Drivers Skip
Tire pressure is the cheapest traction upgrade on any vehicle, and most drivers never touch it. Airing down increases the tire's contact patch, which is exactly what sand and rock want. But pressure is also a safety setting: too low and you risk debeading a tire or overheating the sidewall; too high and you lose flotation and grip.
The right pressure depends on terrain, vehicle weight, and the tire itself. Use the door-jamb placard as your highway baseline, then adjust cautiously for the surface:
| Terrain | Pressure Direction | What It Buys You | Main Risk |
|---|---|---|---|
| Sand | Significant drop from street pressure | Flotation and a longer contact patch | Debeading on sharp turns at very low pressure |
| Rock | Moderate drop | Wider footprint and sidewall flex | Pinched sidewall between tire and rim |
| Mud | Slight to moderate drop | Tread cleaning and bite | Digging in if pressure is too low for the load |
| Snow and ice | Near-street or slight drop | Dense sipes stay engaged | Overheating if driven fast on cleared pavement |
| Pavement | Door-jamb spec | Even wear and handling | None, this is the baseline |
Payload changes the math. A loaded rig with camping gear, water, and passengers needs more pressure than an empty one because the tire carries more weight per square inch of contact patch. Check the vehicle's door-jamb placard for the base figure, then adjust from there.
A portable air compressor and a set of tire deflators make this a two-minute habit instead of a chore. Deflate at the trailhead, reinflate before the drive home. Skipping the reinflation step is the mistake that ruins tires on the highway, low-pressure tires heat up fast at speed and can fail.
For a deeper look at how tire construction affects durability, the Tire Industry Association's consumer tire guidance explains load ratings and sidewall markings. Read the sidewall before you read a review.
Packing, Weight, and Budget Trade-Offs That Decide the Trip
Packing is a budget exercise as much as a space one. Every pound you add costs fuel and handling, and every dollar you spend on gear you never use is a dollar not spent on tires.
Prioritize in this order:
- Tires that match your most common terrain
- Rated recovery points and one pulling tool
- Pressure tools: gauge, compressor, deflators
- Repair supplies and a spare
- Survival and emergency kit
Weight sits on the roof and the rear bumper, where it hurts handling most. Keep heavy tools low and forward. A roof rack full of gear raises the center of gravity on side slopes.
Budget trade-offs are personal, but the rule holds: spend first on the gear that touches the ground, last on the gear that looks good in photos. Vehicle weight and payload limits are set by the manufacturer, so check the door sticker before you load for a long trip.
Build Your Terrain Kit With Outdoor Wilderness Supply
The terrain decides the kit. Rock wants sidewall strength, mud wants self-cleaning tread, sand wants flotation, and every surface wants a safe recovery plan behind it.
Our approach at Outdoor Wilderness Supply is simple: match the tool to the ground, then check that the parts work together. Our curated selection covers recovery gear, camping equipment, and multi-functional survival tools, all chosen for practical performance rather than shelf appeal.
Pick your terrain, build the checklist in order, and test your recovery connections before you need them. Browse our recovery kits and camping gear to start your build, and choose options that fit the trails you actually drive.
Frequently Asked Questions
What gear do you need for off-roading?
Start with four categories: traction (all-terrain or mud-terrain tires), recovery (a kinetic rope, shackles, and a strap), air (a portable compressor and tire deflators), and repair (a tool kit, spare tire, and spare lug nuts). Then add terrain-specific items such as a shovel for mud and sand or a high-lift jack for rock. Build the kit around the terrain you actually drive, not the longest list you can find.
How do you choose tires for different terrains?
Match tread to the ground you drive most. All-terrain tires handle gravel, dirt, and light mud with acceptable road manners. Mud-terrain tires clear sticky mud and climb loose rock but run louder on pavement. For sand, a wider footprint at low pressure beats aggressive tread. Carry a full-size spare and the lug nuts to change it, and check tire durability after every rocky trip.
What recovery gear should you carry off-road?
Carry a kinetic recovery rope, at least two rated shackles, a tree trunk protector, and gloves. Add a winch only if your vehicle and recovery points can handle the load. The [Essential 4x4 Recovery Kit](https://outdoorwildernesssupply.com/products/essential-4x4-recovery-kit) bundles a 19,800 lb kinetic rope, a winch recovery ring, a tree trunk protector, soft and steel bow shackles, and gloves in one bag, so the pieces are rated to work together.
What should beginners bring on an off-road trip?
Beginners should bring a tire pressure gauge, a portable air compressor, a shovel, a first aid kit, water, and a communication plan. Add a recovery rope and shackles before your first mud or sand trip. Skip the heavy accessories until you know your terrain. A light, complete kit you understand beats a heavy kit you have never used.
